The file extension is only part of playback compatibility. A device also needs to support the video codec, audio codec, resolution and other encoding details.
Three Steps to Your Output
Check Your Device
Find the formats your device can play. For broad playback support, MP4 with H.264 video and AAC audio is a useful starting point.
Choose a Preset
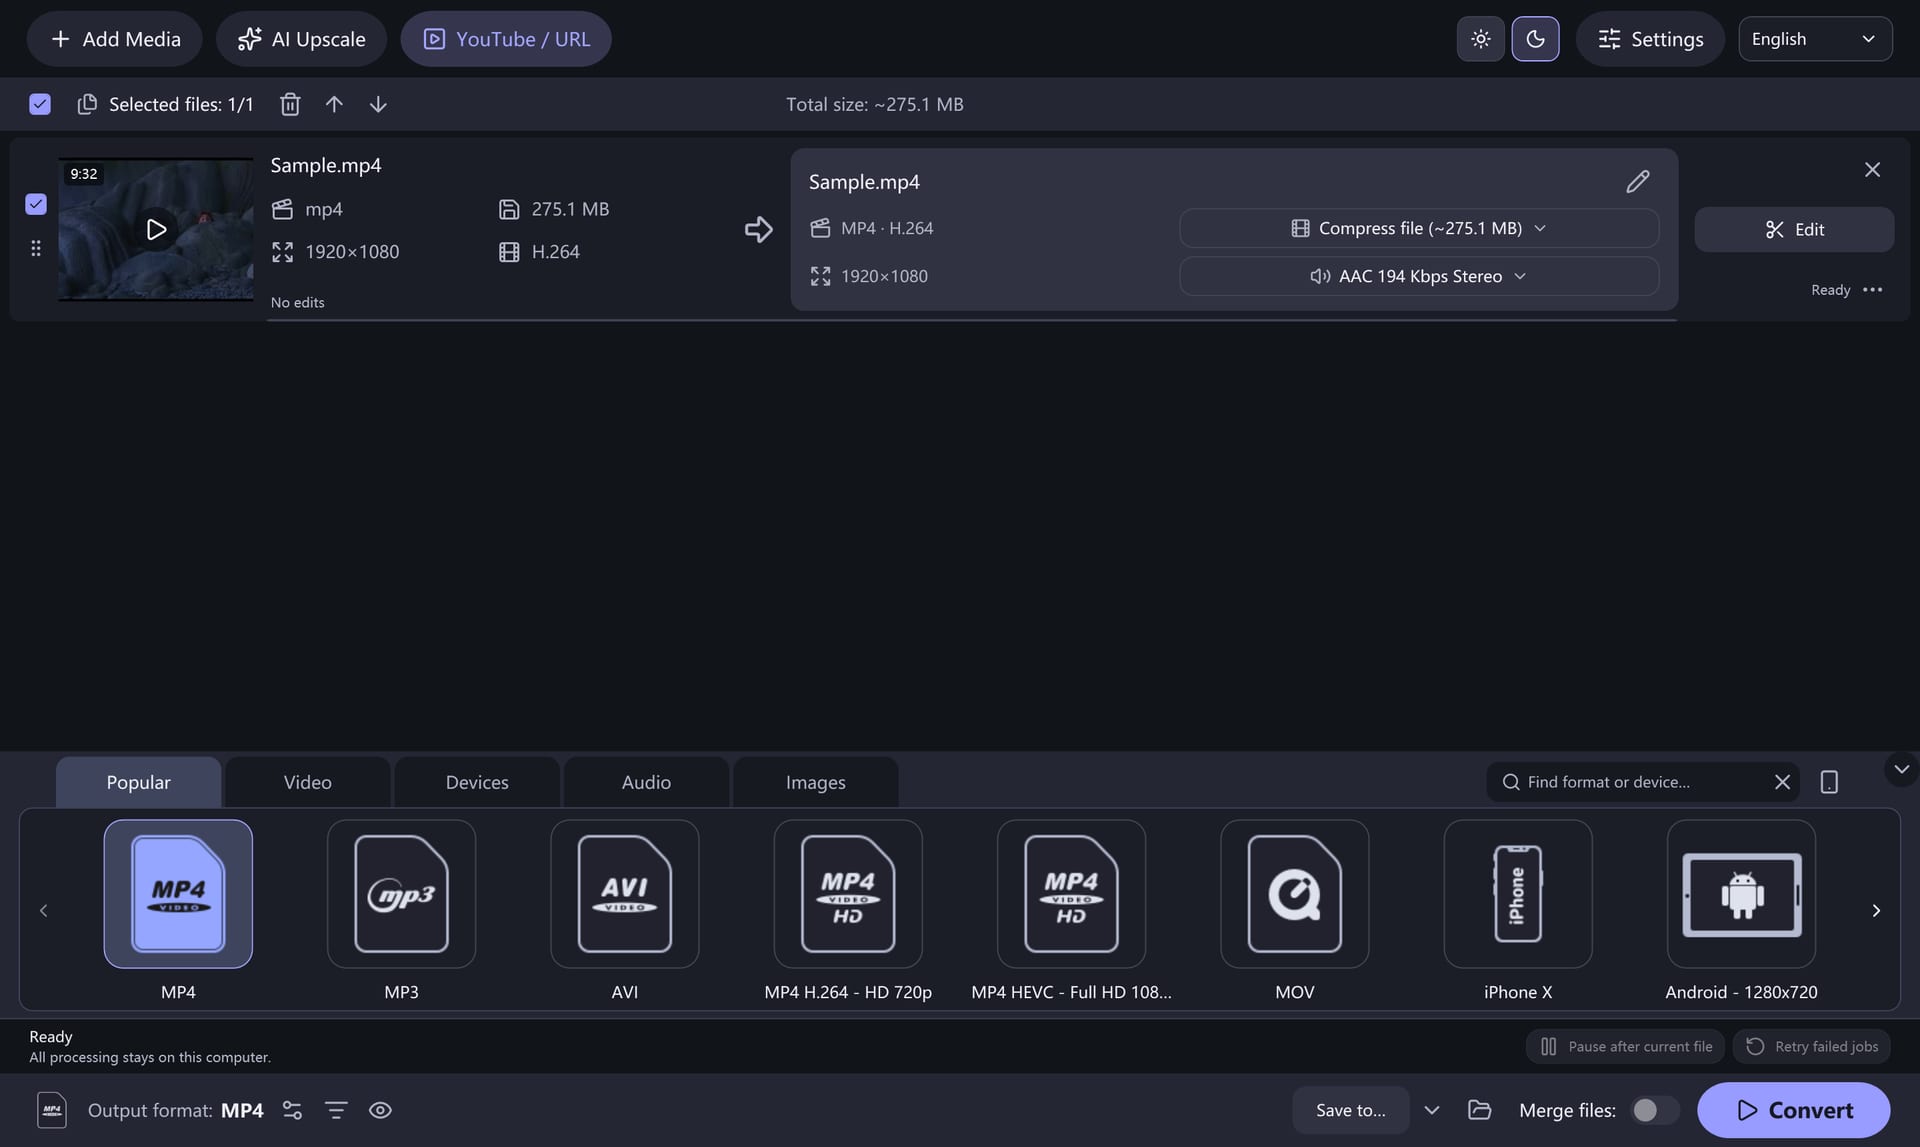
Add your file with Add Media, then choose a matching preset from Devices or Video. Review resolution and quality before converting.
Test the Result
Use Save to to select the output folder and choose Convert. Transfer a short converted clip to the device and check picture, sound and orientation.
Use Presets as a Starting Point
Device presets help select output settings. Their presence is not a guarantee of certification for every model or operating-system version. Check the requirements of the actual player you use.
Earlier Version Reference
Read the Original Tutorial & Screenshots
Archived instructions from the earlier application. The interface, device lists and performance claims refer to that historical version, not the current 8.2.0 build.
Introduction
If you travel quite a bit, a tablet seemed to be the right way to go for long flights. However, not all video formats are supported by your device and you need a video converter to convert for your needs. Free CUDA Movie Converter is a professional video converter that can convert all video formats, popular or rare, to playback on your devices like cell phone, Xoom, Palm, Treo, iPhone, iPod, PSP, Pocket PC, etc. with just a few clicks.
Download the Free CUDA Movie Converter through the link below and save the file to your desktop:
Download Free CUDA Movie Converter
Step 1. Input Video
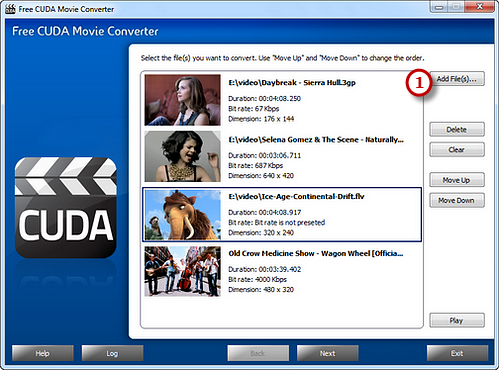
Launch Free CUDA Movie Converter. Click "Add File(s)..."
 to input video files from your computer to the task list. Use
the "Delete" button or "Clear"
button to remove the unwanted files. Click "Move Up"
or "Move Down" button or by dragging the listed
files to queue the added video files to meet your demands. You
can also click "Play" button to play the selected
file with the media player in your system.
Step 2. Preset Output Settings
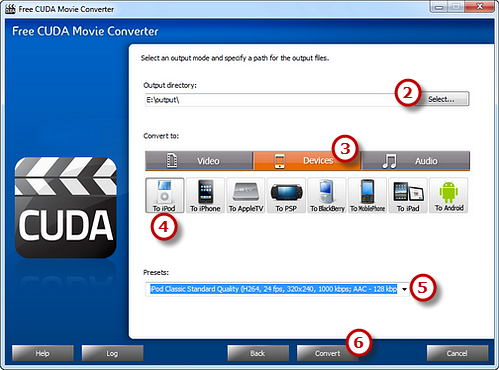
Click "Select..."
 to choose an output folder from your computer to save the output
files. Click "Devices" tab
 to choose an output format
 you need (there are 3 tabs for output formats: "Video", "Devices" &
"Audio" and each tab contains various output formats). Then,
adjust the output quality with the customized presets for every
format in the "Presets"
 dropdown list. Click "Convert"
 to start conversion.
Step 3. Start Conversion
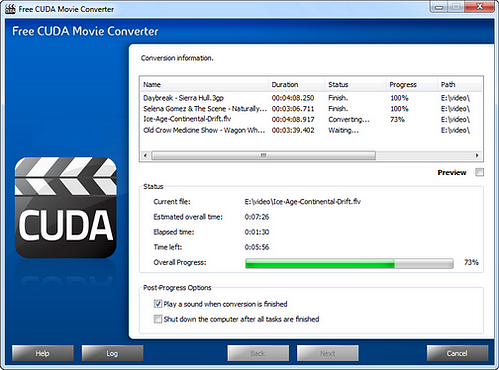
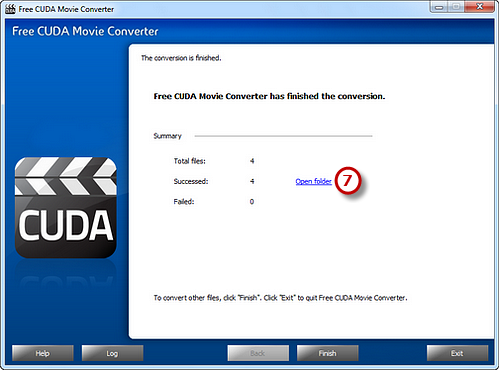
After you hit "Convert", some conversion information and a progress bar will be displayed within just few seconds, like the duration, status and progress of the conversion. The post-process options can be chose to play a sound or shutdown the computer when the conversion is finished.
When the conversion is finished, you can have a view of the
general report about the conversion. Click "Open folder"
 to directly open the output folder to get the converted video
files.
If your question has still not been answered then please submit your query to us and we will contact you as soon as possible.